
Building comps
Build turns a shot into a finished comp: multipass EXRs split into one layer per pass, separate AOV sequences added beside them, passes in the right order, the frame range set. Import selection just brings the files in as footage.
Build or Import?
Section titled “Build or Import?”| Import selection | Build | |
|---|---|---|
| Makes a comp | No — unless you tick Add to the active composition | Yes |
| Splits multipass EXRs | No, they come in as one item | Yes, a layer per pass |
| Blend modes, depth, mattes | No | Set for you |
| Photoshop, Illustrator | As footage, a chosen layer, or one comp per artboard | As compositions |
The Build button names what it will do: Build from folder with nothing selected, Build from N passes with passes selected, Build comp from selection for loose files.
The Build dialog
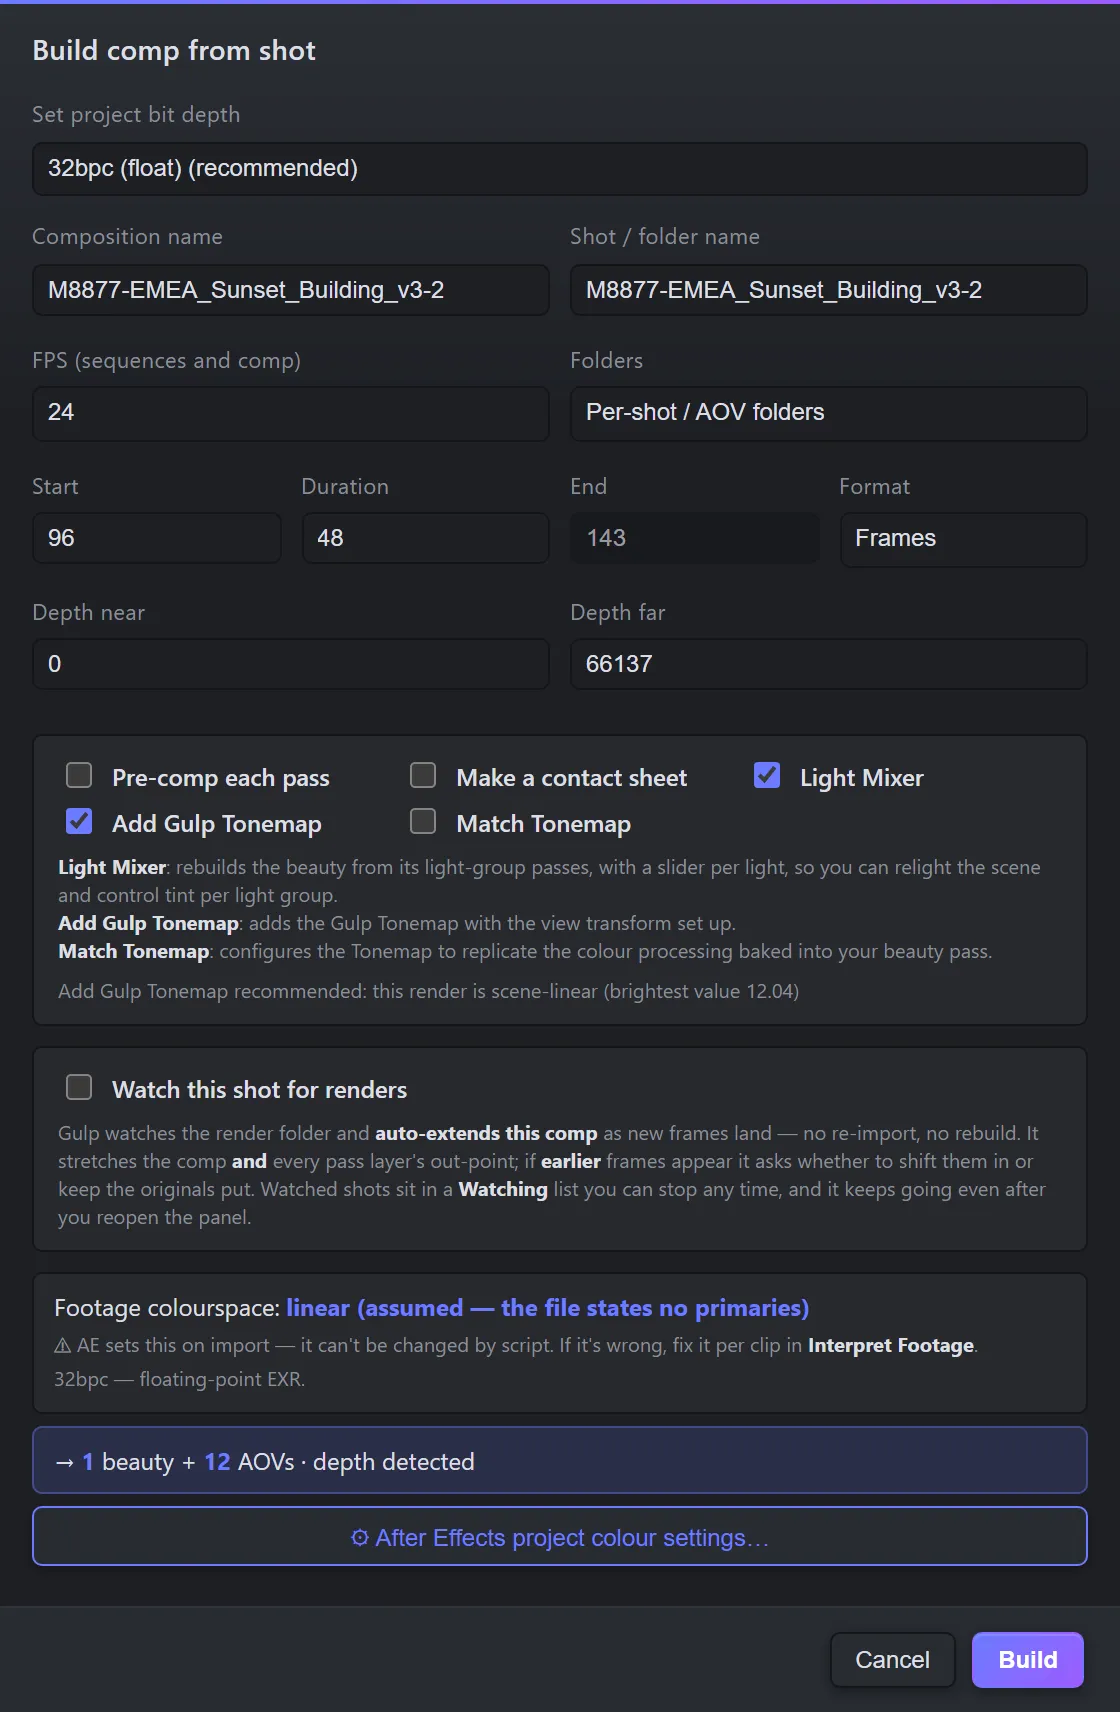
Section titled “The Build dialog”The dialog suggests settings from the footage itself. For most shots you accept them and press Build (or Enter). Esc cancels.
| Option | What it does |
|---|---|
| Composition name, Shot / folder name | Named after the shot. Change them here. |
| FPS | Read from the render where it says. Use source keeps the footage’s own rate; Custom… takes any rate. |
| Folders | How the footage is filed in the Project panel: Per-shot / AOV folders, Maintain folder hierarchy, or Flat (no folders). |
| Start, Duration, End | The comp’s frame range. Start is the shot’s real first frame. Format switches between Frames and SMPTE timecode. |
| Depth near, Depth far | Shown when the shot has a depth pass. Measured from the image, falling back to the render camera. |
| Silence AE missing frames nag in favour of Gulp | After Effects raises a dialog for every sequence with gaps. Gulp already lists the gaps on the row, so this turns off After Effects’ Report missing frames from sequences preference. Turn it back on there any time. |
| Split PuzzleMatte channels into individual luma matte layers | Each ID channel becomes its own greyscale matte layer, ready as a track matte. A PuzzleMatte that holds the same ID on every channel stays one layer. |
| Pre-comp the Redshift shadow stack | Shown when the shot has both Diffuse Filter and Shadows. See below. |
| Watch this shot for renders | Extends the comp as new frames land (full version). See below. |
Extras (full version)
Section titled “Extras (full version)”| Option | What it does |
|---|---|
| Pre-comp each pass | Every pass in a comp of its own, keeping its name, blend mode, on/off state and colour, with its effects inside next to the footage they read. |
| Make a contact sheet | A separate comp with every pass tiled in a grid and captioned with its name. The built comp is left as it is. |
| Light Mixer | Rebuilds the beauty from its light-group passes, with a row per light. See Tonemap and Light Mixer. |
| Add Gulp Tonemap | An adjustment layer with Gulp Tonemap at the top of the comp. Ticked by default in an ACES / OCIO project. |
| Match Tonemap | Compares the render’s colour-processed beauty (the Main) with the scene-linear Beauty AOV and sets Gulp Tonemap to match — a few seconds per build. |
Each extra is off by default and remembered. In the trial they show a FULL VERSION badge.
Colour, at the bottom of the dialog
Section titled “Colour, at the bottom of the dialog”- Footage colourspace is what After Effects will assign on import. Scripts cannot change it; if it is wrong, fix it per clip in Interpret Footage.
- If the footage is floating point and the project is below 32 bpc, a warning says so — values above 1.0 would be clipped.
- When Check renders for scene-linear values is on in Preferences, Gulp reads up to five beauty frames and says whether the render is scene-linear and needs a view transform. For Redshift renders with a separate Beauty AOV, it says which one has the view baked in.
- ⚙ After Effects project colour settings… opens the colour settings. The bit depth you set there is applied when you build.
How the comp is laid out
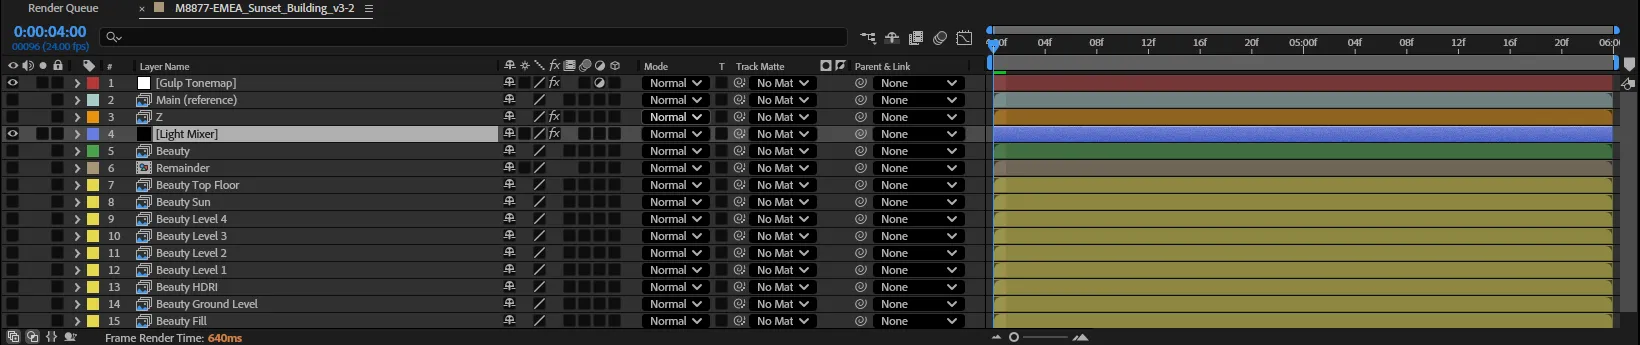
Section titled “How the comp is laid out”- Only the beauty is visible. Every other pass comes in switched off, already blended correctly, so turning one on adds it to the picture rather than blowing it out.
- Lighting passes are set to add onto the beauty.
- Light groups — three or more passes named
Beauty_<light>— are recognised as a set and sum to the beauty. - Data passes — depth, normals, motion vectors — come in as data, not as colour.
- Depth is remapped from the near and far values in the dialog.
- Cryptomatte passes get After Effects’ Cryptomatte effect.
- Each pass is its own named layer, with its channels routed for you.
- Pass layers are colour-coded: beauty green, light groups yellow, lighting blue, utility orange, mattes pink. Change or turn this off in Preferences ▸ Render Pass Colours.
Multipart EXRs
Section titled “Multipart EXRs”EXRs with several parts — from Redshift, Houdini and others — are read with their real pass names, the same as single-part multipass files.
More than one multipass EXR in a shot
Section titled “More than one multipass EXR in a shot”Only one is split into the comp; Gulp asks before building, names them, and adds the others as flat footage.
The Redshift shadow stack
Section titled “The Redshift shadow stack”Pre-comp the Redshift shadow stack folds Diffuse Filter and Shadows into one pre-comp (Shadows set to Multiply), added over the beauty at 0% opacity. That layer’s opacity is the shadow control: 0% leaves the shadows as rendered, 100% removes them.
Watching a render (full version)
Section titled “Watching a render (full version)”Tick Watch this shot for renders and Gulp watches the render folder and extends the comp, and every pass layer, as new frames land — no re-import, no rebuild. Pre-comps, the contact sheet and the Gulp Tonemap layer grow with it. If earlier frames appear, Gulp asks whether to shift them in or keep the originals where they are.
Watched shots sit in a Watching list in the panel. ✕ stops watching; a shot that has been complete and unchanged for 10 minutes retires, and ↻ watches it again. Watching carries on after you reopen the panel.
Several shots at once
Section titled “Several shots at once”Several passes, one comp. With subfolders listed (see Subfolders and cherry-picking), Ctrl-click files or sequences from different folders and press Build: they all go into one comp.
Photoshop and Illustrator
Section titled “Photoshop and Illustrator”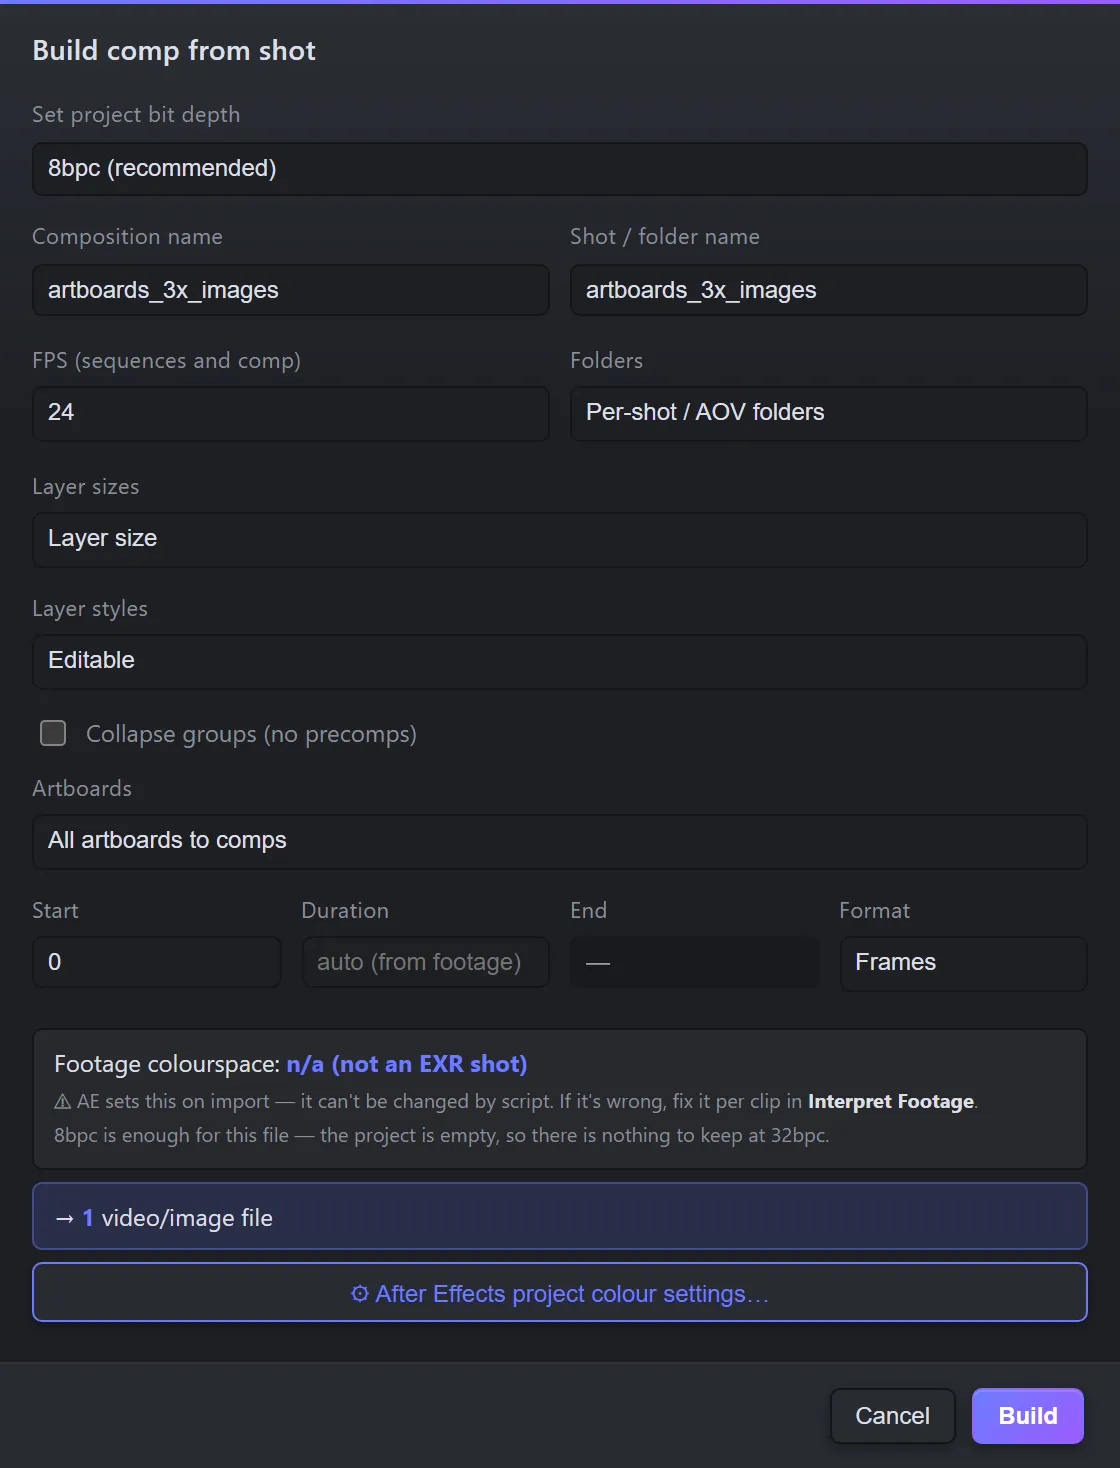
Photoshop
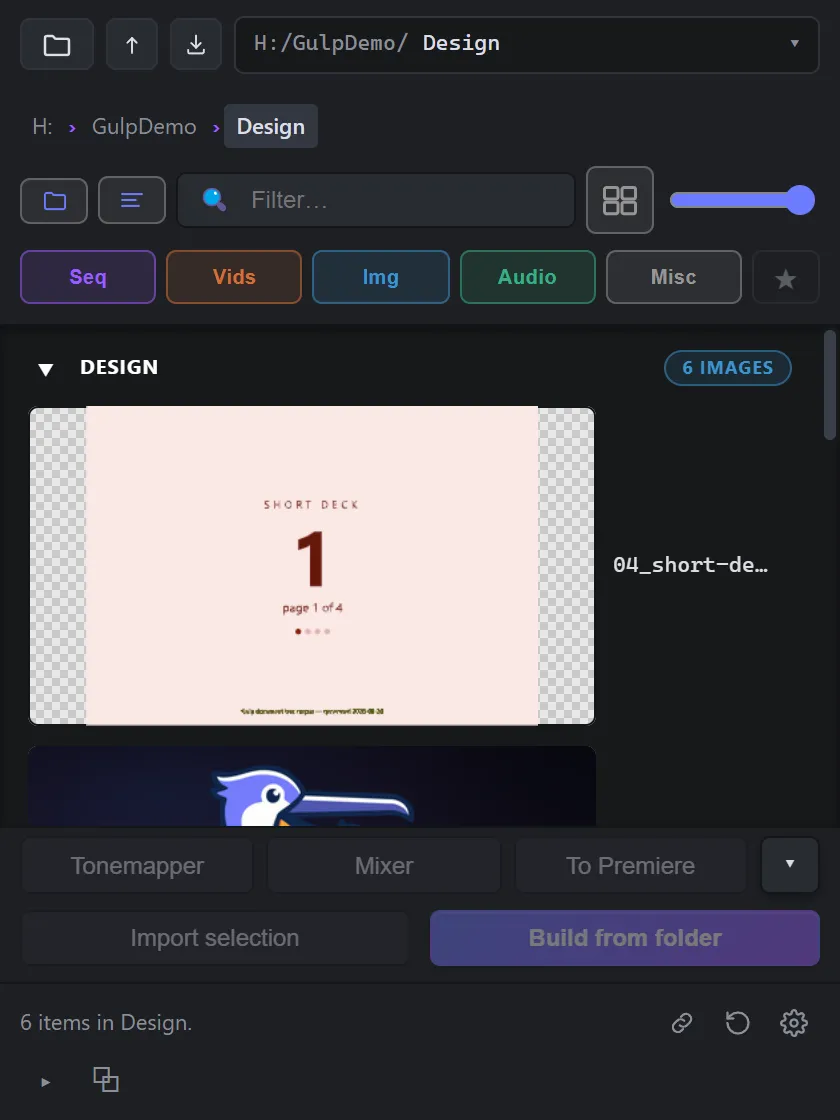
Section titled “Photoshop”Build a .psd or .psb and it comes in as a composition. You can also right-click it for
Build comp (layers + precomps) or Build comp (layers only, no precomps).
| Option | What it does |
|---|---|
| Layer sizes | Layer size crops each layer to its own content; Document size gives every layer the whole canvas. |
| Layer styles | Editable keeps them as After Effects layer styles; Merge into footage bakes them in. |
| Collapse groups (no precomps) | Puts each group’s layers straight into the comp. A group with a mask, layer style, blend mode or transform is kept nested, and Gulp names the ones it kept. |
Group masks, which After Effects drops on import, are rebuilt from the file. Vector masks keep their Subtract, Intersect and Difference modes. Type layers become editable After Effects text (full version).
Artboards
Section titled “Artboards”Every artboard can become its own comp, for Photoshop and Illustrator alike. Choose All artboards to comps or Single Artboard under Artboards in the dialog, or right-click the file for Import all N artboards to comps or Import one artboard.
Illustrator
Section titled “Illustrator”Artboards come in as vector, with Continuous Rasterize on and their Illustrator layers kept. When you import artboards, these options appear:
| Option | What it does |
|---|---|
| Separate objects into shape layers | Each object goes onto its own shape layer. |
| Centre anchor points on each layer | Each layer’s anchor sits on the layer itself. |
| Put placed images back as layers | Placed images come back as their own layers, where the artwork drew them. Offered when objects are separated. |
| Bring type across as editable text layers | Live type becomes After Effects text — font, size, colour, tracking and leading read from the file (full version). |
A font After Effects only has a stand-in for is named in the log.
The Import dialog
Section titled “The Import dialog”Import selection opens a shorter dialog.
| Option | What it does |
|---|---|
| FPS | The frame rate for sequences. |
| Import into | Select project panel location, New shot folder at current location, New shot folder at root, Maintain folder hierarchy or Flat at project root. |
| New folder name | For the new shot folder options. |
| Photoshop | Merged layers, All layers (as footage) or Choose layer…, with Footage dimensions and Layer styles. |
| Add to the active composition | Puts the footage into the comp you have open. |
Where each kind of media is filed in the Project panel is set in Preferences ▸ Project Organisation.
The Build tour
Section titled “The Build tour”The first time you open Build, Gulp offers a short tour of the dialog. Run it again from Preferences ▸ Help.